How I renew my TLS certificates automatically thanks to Let's Encrypt
TL;DR: this post explains how my VPS automatically renew its HTTPS certificates, by using Let’s Encrypt and a simple crontab.
You said Let’s Encrypt?
First of all, you may not have heard of Let’s Encrypt, which is a free,
automated, and open certificate authority (CA), run for the public’s benefit.
One of its goal is to make the use of a SSL/TLS certificate (that gives you the
HTTPS) more widespread, mainly by providing users with free certificates and
in a very simple way: all you have to do is to install their tool
letsencrypt on your server and then to run one command to retrieve and install
the certificate.
![]()
Well, this is the theory, and the script is still in beta so it may require a bit of tweaking to actually receive your certificate, but it is still a very easy task.
To actually give you the certificate you need and to prevent you from asking a
certificate for google.com, Let’s Encrypt checks that the server running the
script does receive traffic for the domain name you specified. If I want to get
a certificate for lab.securem.eu, Let’s Encrypt will check that I do receive
the HTTP(S) requests for lab.securem.eu.
In my case, I have an OpenVPN server running on port 443, and I configured it
with the port-share parameter that allows the non-OpenVPN traffic to be
forwarded to another address/port. My Apache is also listening on the port 444
so I forward all the non-OpenVPN traffic on port 443 to this alternative port. I
am not quite sure this is the reason of Let’s Encrypt having problems but it
most certainly plays a role.
Get your first certificate
To start, you can try the standalone mode that will run a little server
locally, and listen on the port 80 or 443 for the challenges. Let’s choose the
port 443, because we do not have yet any HTTPS-enabled website.
First, install the tool:
git clone https://github.com/letsencrypt/letsencrypt
cd letsencrypt
./letsencrypt-auto --help
Let’s retrieve your certificate! We will use the standalone mode, so you will
have to stop all the services listening on port 443. In my case:
sudo service apache2 stop
Then, just run one command:
./letsencrypt-auto certonly --standalone --standalone-supported-challenge tls-sni-01
Use http-01 instead of tls-sni-01 if you prefer to bind to port 80.
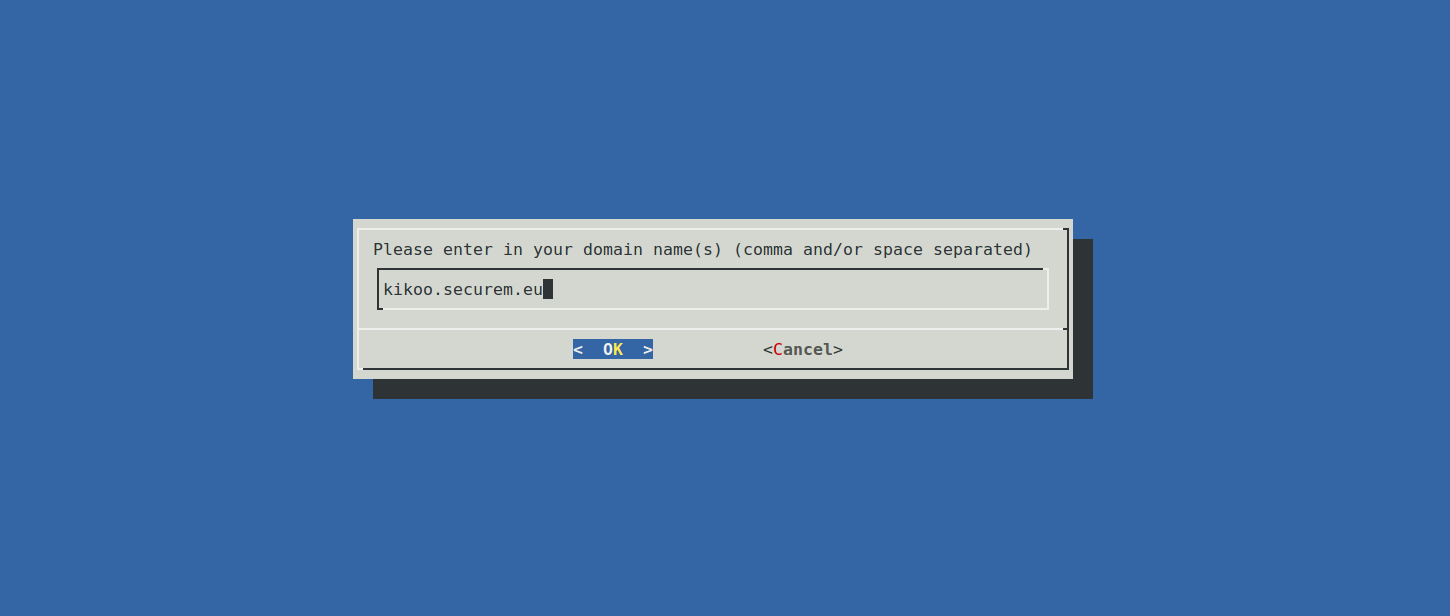
Just enter the domain(s) the server owns and for which you want a certificate. Et voilà!, you got the appropriate certificate! Any additional domains will be contained in the certificate using the SNI extension (Server Name Indication) that allows one server and one certificate to respond to multiple HTTPS-enabled domains with no name clash.

Now, all you have to do is to configure your web server (or whatever will use
the certicate) and point it to the
/etc/letsencrypt/live/your.domain.here/fullchain.pem public certificate file.
The private key is placed in the same folder, as privkey.pem.
This process is really fast and easy compared to other CA where you have to send documents by mail or at least to wait for a few days.
One thing you may have noticed is that the certificates are only valid for three months. This is done on purpose, for security reasons (in case of key compromise and mis-issuance) and to encourage automation. This means that in three months you will receive an email saying that your domains are close to the expiry date and that you should renew them as soon as possible.
Automatically renewing the certificates using the webroot method
After manually renewing you certificates the first two times, you will begin to say “Hey, I will definitely automate this process!”. Lucky you, Let’s Encrypt is really easy to automate.
If we automate it, we won’t be using the standalone server as we don’t want to
stop and start the Apache daemon with no user interaction (and because we don’t
like downtime). If you are lucky, you may be able to use the apache or even
nginx plugins that automate everything for you. If you are not, like me,
give a try to the webroot method. With this method, Let’s Encrypt will try
to access a file inside a .well-known directory at the root of your website.
In my case, it will try to access a file at
http://kikoo.securem.eu/.well-known/letsencrypt-challenge-something. This method
allows to keep your website running for every other endpoints on
http://kikoo.securem.eu/.
First step: configure you virtualhost to redirect the requests on
.well-known to /var/www/letsencrypt-webroot/.well-known. For Apache, all you
need is an Alias directive (don’t forget to reload the configuration after
that):
Alias /.well-known/ /var/www/letsencrypt-webroot/.well-known/
Second step: Run the command a first time to ensure everything works fine:
./letsencrypt-auto certonly -d your.expiring.domain.com --webroot --webroot-path /var/www/letsencrypt-webroot/ --non-interactive
I chose to put then renew command in a crontab, ran as root as it needs to access protected parts of the system. It is ran every month at 1am.
sudo crontab -e
# This should open an editor, so add the following line
0 1 1 * * /where/you/installed/letsencrypt/letsencrypt-auto certonly -d your.expiring.domain.com --webroot --webroot-path /var/www/letsencrypt-webroot/ --non-interactive && nginx -s reload
One important thing is that you need to reload your webserver (the && nginx
-s reload part) to make it use the new certificate: without that it will
continue using the old one. Thanks to Justin Finkelstein in the comments for
pointing it out.
Now you can let your server manage its own certificates :)

I hope this article will be useful to you, let me know how YOU proceed to renew your certificates!